An LED in every plushie
April 10, 2014Happily, one of my co-conspirators in the are-you-ok widget knows how to sew which means that we can progress to the next steps of development: productization.
Here is what it looks like now.
That is distinctly not cute. The jar of frosted glass is to hide the LED, so it doesn’t shine brightly in my eyes, the glass diffuses the LED. This is not a long term solution.
Right now the LED color is related to whatever the acceleration is: if the board is in the shown configuration, then the LED shines blue. If I tweak it to be on one edge or the other, it shines red or green. I enjoyed playing with the accelerometer to color translation but it was always just a diversion, to make sure I could see what I was doing.
So, why is the device going to have an LED? It is important for the user to know the unit received their attention. But I also need to show errors: low battery and no WiFi connection. With an RGB LED, my plan was:
- GREEN or WHITE = acknowledge
- YELLOW = low battery
- RED = no WiFi
But now that we are talking about building the plushie, there were many good questions about the LED.
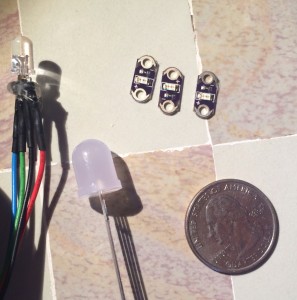
I am currently using a simple, standard RGB LED. If we use it, we’ll have to put it behind something (i.e. fabric that passes the light or milk jug material to diffuse the glow).
There is another option. I have small LEDs that are intended to be sewn into a device, to be shown. We could make them into coat buttons (one green, one yellow, one read).
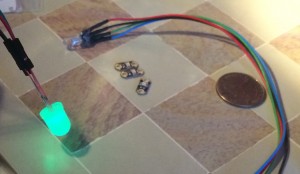
When purchasing for this widget, I got a larger (no more powerful, just physically larger) LED with built in diffuser. This lets the light be a nose or center of a bowtie, something external to the device. I finally connected it today, it looks really nice (taking a picture of a lit LED is not a good way to see it, let’s just say that diffuser creates a gentle glow).
The LED will be on a long set of wires, 5-12″ depending on what is needed. The wire leads (shown in the glowy picture) will be clipped so there is little or no metal showing but there will be about an inch of rigidity after the LED.
Either of the two RGB LEDs can be hot glued to fabric or their wires can be sewn into the fabric. Either way will secure them. The single-color LEDs have those easy-sew holes.
The accelerometer will also be on a five-wire cable. It can be placed away from the rest of the electronics and the battery. This will let it be in the hand if we want the user to shake hands to wake up the widget. Or it could be on the head and the user can pat it. (And this is why an accelerometer is superior to a button. (I hope!))
The rest of the electronics (battery, charging board, electric imp board and the connections) should all be low in the creature, keeping its center of gravity low to allow for upright posture of the animal. Further, the back should velcro closed; we need to program the Imp for the WiFi of the house: we will need access to it.
Next, the system is battery powered (USB charging). The USB port (or cable) needs a way to be inserted, ideally without slipping out all of the other electronics guts.
A few more thoughts on making the plushie: child-safe material is critical, nothing flammable. I will make the electronics as safe as I can but having something like nylon which is both electrostatic and amazing flammable, well, I strongly prefer felt.


